|
|
| Line 13: |
Line 13: |
| {{GymLeaderInfo|Leader=Misty|Type=Water|Badge=Cascade|Town=Cerulean City|Lineup=Poliwag,Horsea,Starmie|Moves0=Hypnosis,Bubble,Double Slap,Water Gun|Moves1=Leer,Twister,Hidden Power,Bubble Beam|Moves2=Icy Wind,Bubble Beam,Psyshock,Confuse Ray}} | | {{GymLeaderInfo|Leader=Misty|Type=Water|Badge=Cascade|Town=Cerulean City|Lineup=Poliwag,Horsea,Starmie|Moves0=Hypnosis,Bubble,Double Slap,Water Gun|Moves1=Leer,Twister,Hidden Power,Bubble Beam|Moves2=Icy Wind,Bubble Beam,Psyshock,Confuse Ray}} |
|
| |
|
| {{GymLeaderInfo|Leader=Lt. Surge|Type=Electric|Badge=Thunder|Town=Vermilion City|Lineup=Voltorb,Pikachu,Electrode,Raichu|Moves0=Charge Beam,Swift,Electro Ball,Selfdestruct|Moves1=Thunder Wave,Feint,Double Team,Spark|Moves2=Sonic Boom,Spark,Rollout,Thunderbolt|Moves3=Thunderbolt,Thunder Wave,Growl,Dig}} | | {{GymLeaderInfo|Leader=Lt. Surge|Type=Electric|Badge=Thunder|Town=Vermilion City|Lineup=Voltorb,Pikachu,Electrode,Raichu|Moves0=Charge Beam,Swift,Electro Ball,Self-Destruct|Moves1=Thunder Wave,Feint,Double Team,Spark|Moves2=Sonic Boom,Spark,Rollout,Thunderbolt|Moves3=Thunderbolt,Thunder Wave,Growl,Dig}} |
|
| |
|
| {{GymLeaderInfo|Leader=Erika|Type=Grass|Badge=Rainbow|Town=Celadon City|Lineup=Victreebel,Ivysaur,Vileplume|Moves0=Sleep Powder,Razor Leaf,Hidden Power,Energy Ball|Moves1=Leech Seed,Growl,Growth,Energy Ball|Moves2=Sonic Boom,Spark,Rollout,Thunderbolt|Moves3=Mega Drain,Sludge Bomb,Toxic,Return}} | | {{GymLeaderInfo|Leader=Erika|Type=Grass|Badge=Rainbow|Town=Celadon City|Lineup=Victreebel,Ivysaur,Vileplume|Moves0=Sleep Powder,Razor Leaf,Hidden Power,Energy Ball|Moves1=Leech Seed,Growl,Growth,Energy Ball|Moves2=Sonic Boom,Spark,Rollout,Thunderbolt|Moves3=Mega Drain,Sludge Bomb,Toxic,Return}} |
Gyms are Pokémon-trainer facilities that have been officialized by the Pokémon League to certify challengers with badges—accolades that qualify a player's eligibility for the aforementioned league. The officials that preside over the Gyms are referred to as Gym-leaders.
Eight Gyms are stationed in each of the four mainland regions (Kanto, Johto, Hoenn and Sinnoh); badges must be culled from each one of them in order to qualify for the regional Pokémon-league tournament. Because your access is localized to the environs of the Gym city until you obtain its rewarded badge, every Gym must be defeated in order for your regional travel and the compulsory storyline to be progressible.
If you lose to a Gym-leader, you'll be able to instantaneously rechallenge them; however, all subsequent battles will void off any experience-points and Pokémoney payouts that would have been reaped from wining the initial battle. Upon defeat, you can rechallenge Gym-leaders to win berries. The peripheral trainers of the Gym can be continually rechallenged after a one-week cooldown, and they'll always pay off Pokémoney and experience points.
All Gym-leader and -trainer levels are currently hidden as an incorporated element of the challenge; however, they are approximable with the following formula: Gym number x 10 + 5. For example, Vermilion Gym, the third Kanto Gym, deploys approximately level-35 Pokémon.
Leaders
Kanto
 |
 | Brock | |
|---|
|
|
|
 |
 | Misty | |
|---|
|
|
|
 |
 | Lt. Surge | |
|---|
|
|
|
 |
 | Erika | |
|---|
|
|
|
 |
 | Janine | |
|---|
|
|
|
 |
 | Sabrina | |
|---|
|
|
|
 |
 | Blaine | |
|---|
|
|
|
 |
 | Giovanni | |
|---|
|
|
|
Johto
 |
 | Falkner | |
|---|
|
|
|
 |
 | Bugsy | |
|---|
|
|
|
 |
 | Whitney | |
|---|
|
|
|
 |
 | Morty | |
|---|
|
|
|
 |
 | Chuck | |
|---|
|
|
|
 |
 | Jasmine | |
|---|
|
|
|
 |
 | Pryce | |
|---|
|
|
|
 |
 | Claire | |
|---|
|
|
|
Hoenn
 |
 | Roxanne | |
|---|
|
|
|
 |
 | Brawly | |
|---|
|
|
|
 |
 | Wattson | |
|---|
|
|
|
 |
 | Flannery | |
|---|
|
|
|
 |
 | Norman | |
|---|
|
|
|
 |
 | Winona | |
|---|
|
|
|
 |
 | Tate and Liza | |
|---|
|
|
|
 |
 | Wallace | |
|---|
|
|
|
Sinnoh
 |
 | Roark | |
|---|
|
|
|
 |
 | Gardenia | |
|---|
|
|
|
 |
 | Maylene | |
|---|
|
|
|
 |
 | Wake | |
|---|
|
|
|
 |
 | Fantina | |
|---|
|
|
|
 |
 | Byron | |
|---|
|
|
|
 |
 | Candice | |
|---|
|
|
|
 |
 | Volkner | |
|---|
|
|
|
Move-technique rewards
As a supplementary reward to the Gym's badge, most Gym-greeters will permanently offer move techniques—a TM or move-tutorship access for a move of a type that tallies to the Gym's specialistic type. The TM-selling Gym-greeters will also offer cumulative-discount bundles of 5 TMs for four times the singular price of the TM, effectively discounting the price for 1 of the 5 TMs.
The first purchase of the Gym's TM is discounted to half the price; any subsequent purchases will charge the full price or 5-piece discount, depending on what option is selected.
Kanto
| Gym |
Impartation |
Move |
Prices |
| First purchase | Standard | Five |
| Pewter City | TM34 | Bide |  375 375 | 750 | 3,000 |
| Cerulean City | TM11 | Bubble Beam | 750 | 1,500 | 6,000 |
| Vermilion City | TM24 | Thunderbolt | 1,500 | 3,000 | 12,000 |
| Celadon City | TM101 | Giga Drain | 4,000 | 8,000 | 32,000 |
| Fuchsia City | TM06 | Toxic | 2,500 | 5,000 | 20,000 |
| Saffron City | TM29 | Psychic | 4,500 | 9,000 | 36,000 |
| Cinnabar Island | TM38 | Fire Blast | 6,000 | 12,000 | 48,000 |
| Viridian City | TM26 | Earthquake | 4,500 | 9,000 | 36,000 |
Johto
| Gym |
Impartation |
Move |
Prices |
| First purchase | Standard | Five |
| Violet City | TM94 | Aerial Ace | 1,500 | 3,000 | 12,000 |
| Azalea Town | TM139 | U-turn | 3,000 | 6,000 | 24,000 |
| Goldenrod City | Tutor | Echoed Voice | N/A | 3,500 | N/A |
| Ecruteak City | Tutor | Ominous Wind | N/A | 10,000 | N/A |
| Cianwood City | Tutor | Drain Punch | N/A | 10,000 | N/A |
| Olivine City | Tutor | Iron Head | N/A | 10,000 | N/A |
| Mahogany Town | TM90 | Avalanche | 3,500 | 7,000 | 28,000 |
| Blackthorn City | Tutor | Dragon Pulse | N/A | 8,500 | N/A |
Hoenn
| Gym |
Impartation |
Move |
Prices |
| First purchase | Standard | Five |
| Rustboro City | TM89 | Rock Tomb | 1,500 | 3,000 | 12,000 |
| Dewford Town | TM58 | Bulk Up | 1,500 | 3,000 | 12,000 |
| Mauville City | TM24 | Thunderbolt | 1,500 | 3,000 | 12,000 |
| Lavaridge Town | TM100 | Overheat | 7,500 | 15,000 | 60,000 |
| Petalburg City | TM92 | Facade | 3,000 | 6,000 | 24,000 |
| Fortree City | TM69 | Roost | 4,500 | 9,000 | 36,000 |
| Mossdeep City | TM54 | Calm Mind | 3,000 | 6,000 | 24,000 |
| Sootopolis City | TM105 | Scald | 4,500 | 9,000 | 36,000 |
Sinnoh
| Gym |
Impartation |
Move |
Prices |
| First purchase | Standard | Five |
| Oreburgh City | TM142 | Rock Polish | 2,000 | 4,000 | 16,000 |
| Eterna City | TM151 | Grass Knot | 3,500 | 7,000 | 28,000 |
| Veilstone City | TM64 | Drain Punch | 4,000 | 8,000 | 32,000 |
| Pastoria City | Tutor | Hone Claws | N/A | 7,000 | N/A |
| Hearthome City | TM80 | Shadow Ball | 4,500 | 9,000 | 36,000 |
| Canalave City | TM147 | Flash Cannon | 4,500 | 9,000 | 36,000 |
| Snowpoint City | TM14 | Blizzard | 6,000 | 12,000 | 48,000 |
| Sunyshore City | Tutor | Frustration | N/A | 15,000 | N/A |
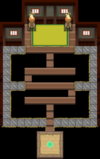
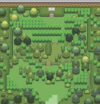
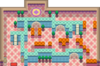
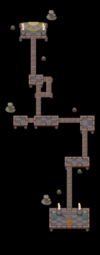
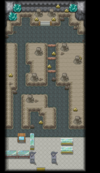
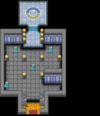
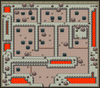
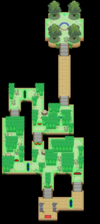
Gym layouts
Kanto
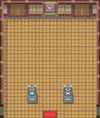
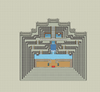
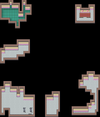
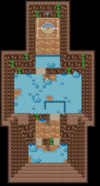
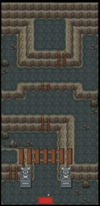
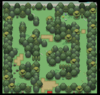
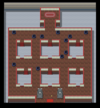
| Kanto Gyms |
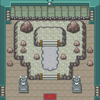 | 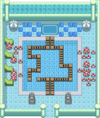 | 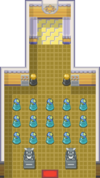 | 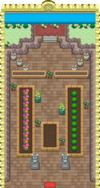 |
| Pewter Gym | Cerulean Gym | Vermilion Gym | Celadon Gym |
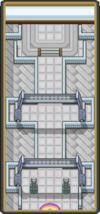
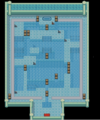
 |  |  |  |
| Fuchsia Gym | Saffron Gym | Cinnabar Gym | Viridian Gym |
Johto
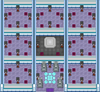
| Johto Gyms |
 |  |  |  |
| Violet Gym | Azalea Gym | Goldenrod Gym | Ecruteak Gym |
 |  |  |  |
| Cianwood Gym | Olivine Gym | Mahogany Gym | Blackthorn Gym |
Hoenn
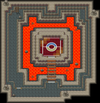
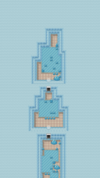
| Hoenn Gyms |
 |  |  |  |
| Rustboro Gym | Dewford Gym | Mauville Gym | Lavaridge Gym |
 |  |  |  |
| Petalburg Gym | Fortree Gym | Mossdeep Gym | Sootopolis Gym |
Sinnoh
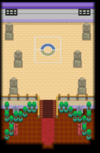
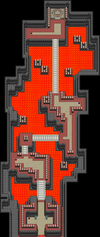
| Sinnoh Gyms |
 |  |  |  |
| Oreburgh Gym | Eterna Gym | Veilstone Gym | Pastoria Gym |
| File:Hearthome Gym.png | 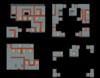 | 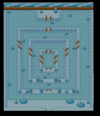 | 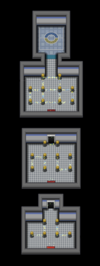 |
| Hearthome Gym | Canalave Gym | Snowpoint Gym | Sunyshore Gym |


