|
|
| Line 40: |
Line 40: |
|
| |
|
| {{GymLeaderInfo|Leader=Claire|Type=Dragon|Badge=Rising|Town=Blackthorn City|Lineup=Kingdra,Aerodactyl,Dragonair,Dragonite,Charizard|Moves0=Dragon Dance,Rain Dance,Waterfall,Outrage|Moves1=Ancient Power,Stone Edge,Crunch,Thunder Fang|Moves2=Dragon Dance,Thunder Wave,Dragon Rush,Aqua Tail|Moves3=Dragon Claw,Dragon Dance,Extreme Speed,Earthquake|Moves4=Belly Drum,Flare Blitz,Wing Attack,Dragon Claw}} | | {{GymLeaderInfo|Leader=Claire|Type=Dragon|Badge=Rising|Town=Blackthorn City|Lineup=Kingdra,Aerodactyl,Dragonair,Dragonite,Charizard|Moves0=Dragon Dance,Rain Dance,Waterfall,Outrage|Moves1=Ancient Power,Stone Edge,Crunch,Thunder Fang|Moves2=Dragon Dance,Thunder Wave,Dragon Rush,Aqua Tail|Moves3=Dragon Claw,Dragon Dance,Extreme Speed,Earthquake|Moves4=Belly Drum,Flare Blitz,Wing Attack,Dragon Claw}} |
| | |
| | ===Hoenn=== |
| | {{GymLeaderInfo|Leader=Roxanne|Type=Rock|Badge=Stone|Town=Rustboro City|Lineup=Geodude,Nosepass|Moves0=Rollout,Magnitude,Rock Throw,Rock Climb|Moves1=Thunder Wave,Rock Throw,Harden,Rollout}} |
| | |
| | {{GymLeaderInfo|Leader=Brawly|Type=Fighting|Badge=Knuckle|Town=Dewford Town|Lineup=Makuhita,Machop,Heracross|Moves0=Force Palm,Knock Off,Focus Energy,Rock Tomb|Moves1=Knock Off,Seismic Toss,Brick Break,Strength|Moves2=Horn Attack,Night Slash,Counter,Stone Edge}} |
| | |
| | {{GymLeaderInfo|Leader=Wattson|Type=Electric|Badge=Dynamo|Town=Mauville City|Lineup=Magnemite,Voltorb,Magneton,Manectric|Moves0=Thunder Wave,Zen Headbutt,Thunderbolt,Metal Sound|Moves1=Rollout,Electro Ball,Sonic Boom,Charge Beam|Moves2=Zap Cannon,Tri Attack,Thunder,Mirror Shot|Moves3=Ice Fang,Charge Beam,Thunder Wave,Flamethrower}} |
| | |
| | {{GymLeaderInfo|Leader=Flannery|Type=Fire|Badge=Heat|Town=Lavaridge Town|Lineup=Slugma,Numel,Torkoal,Chandelure|Moves0=Flame Burst,Rock Throw,Ancient Power,Light Screen|Moves1=Magnitude,Flame Burst,Flame Charge,Rock Tomb|Moves2=Body Slam,Fire Blast,Lava Plume,Sunny Day|Moves3=Pain Split,Flame Burst,Will-O-Wisp,Shadow Ball}} |
| | |
| | {{GymLeaderInfo|Leader=Norman|Type=Normal|Badge=Balance|Town=Petalburg City|Lineup=Slaking,Vigoroth,Slaking|Moves0=Giga Impact,Hammer Arm,Punishment,Aerial Ace|Moves1=Focus Punch,Fury Swipes,Brick Break,Chip Away|Moves2=Giga Impact,Hammer Arm,Punishment,Aerial Ace}} |
| | |
| | {{GymLeaderInfo|Leader=Winona|Type=Flying|Badge=Feather|Town=Fortree City|Lineup=Skarmory,Pelipper,Tropius,Swellow,Honchkrow|Moves0=Stealth Rock,Whirlwind,Steel Wing,Night Slash|Moves1=Hurricane,Hydro Pump,Ice Beam,Wing Attack|Moves2=Leaf Storm,Body Slam,Synthesis,Fly|Moves3=Brave Bird,Focus Energy,Echoed Voice,Fly|Moves4=Brave Bird,Sucker Punch,Thunder Wave,Night Slash}} |
| | |
| | {{GymLeaderInfo|Leader=Tate and Liza|Type=Psychic|Badge=Mind|Town=Mossdeep City|Lineup=Lunatone,Solrock|Moves0=Moon Blast,Rock Slide,Cosmic Power,Psychic|Moves1=Fire Blast,Psychic,Stone Edge,Cosmic Power}} |
| | |
| | {{GymLeaderInfo|Leader=Wallace|Type=Water|Badge=Rain|Town=Sootopolis City|Lineup=Luvdisc,Whiscash,Walrein,Seaking,Milotic|Moves0=Water Pulse,Toxic,Blizzard,Rain Dance|Moves1=Earthquake,Future Sight,Blizzard,Dive|Moves2=Body Slam,Blizzard,Sheer Cold,Rollout|Moves3=Horn Drill,Waterfall,Megahorn,Poison Jab|Moves4=Hypnosis,Hydro Pump,Blizzard,Dragon Pulse}} |
| ==Move-technique rewards== | | ==Move-technique rewards== |
| As a supplementary reward to the gym's badge, most gym-greeters will also give a permanent congratulatory reward to the victorious trainer by imparting move techniques—a [[TMs|TM]] or [[Move tutors|move-tutorship access]] for a move of a type that tallies to the gym's specialistic type. The TM-selling gym-greeters will also offer cumulative-discount bundles of 5 TMs that cost as much as it would require to pay the single-purchase price of the TM four times, effectively discounting the price for 1 of the 5 TMs. | | As a supplementary reward to the gym's badge, most gym-greeters will also give a permanent congratulatory reward to the victorious trainer by imparting move techniques—a [[TMs|TM]] or [[Move tutors|move-tutorship access]] for a move of a type that tallies to the gym's specialistic type. The TM-selling gym-greeters will also offer cumulative-discount bundles of 5 TMs that cost as much as it would require to pay the single-purchase price of the TM four times, effectively discounting the price for 1 of the 5 TMs. |
| Line 68: |
Line 85: |
| {{GymRewardRow|Town=Rustboro City|Move=Rock Tomb|Mode=TM|Price=3000}} | | {{GymRewardRow|Town=Rustboro City|Move=Rock Tomb|Mode=TM|Price=3000}} |
| {{GymRewardRow|Town=Dewford Town|Move=Bulk Up|Mode=TM|Price=2500}} | | {{GymRewardRow|Town=Dewford Town|Move=Bulk Up|Mode=TM|Price=2500}} |
| | {{GymRewardRow|Town=Mauville City|Move=Thunderbolt|Mode=TM|Price=3000}} |
| {{GymRewardRow|Town=Lavaridge Town|Move=Overheat|Mode=TM|Price=7000}} | | {{GymRewardRow|Town=Lavaridge Town|Move=Overheat|Mode=TM|Price=7000}} |
| {{GymRewardRow|Town=Petalburg City|Move=Facade|Mode=TM|Price=3500}} | | {{GymRewardRow|Town=Petalburg City|Move=Facade|Mode=TM|Price=3500}} |
| This article has been identified as a stub; its content needs to be either furtherly developed, rewritten, or updated. Read the discussion page for possible information, regardingly. You can help Pokemon Revolution Online Wiki by expanding it.
|
Gyms are Pokémon-trainer facilities that have been officialized by the Pokémon League to certify challengers with badges—accolades that qualify a player's eligibility for the aforementioned league. The officials that preside over the gyms are referred to as gym-leaders.
Eight gyms are stationed in each of the three mainland regions (Kanto, Johto, and Hoenn); badges must be culled from each one of them in order to qualify for the regional Pokémon-league tournament. Because your access is localized to the environs of the gym city until you obtain its rewarded badge, every gym must be defeated in order for your regional travel and the compulsory storyline to be progressible.
Gym-leaders are not rechallengable after you have defeated them; they are only rechallengable upon losing to them, and all subsequent battles will void off any experience-points and Pokémoney payouts that would have been reaped from winning, otherwise. However, the peripheral trainers of the gym can be continually rechallenged after a one-week cooldown.
Leaders
Kanto
 |
 | Brock | |
|---|
|
|
|
 |
 | Misty | |
|---|
|
|
|
 |
 | Lt. Surge | |
|---|
|
|
|
 |
 | Erika | |
|---|
|
|
|
 |
 | Janine | |
|---|
|
|
|
 |
 | Sabrina | |
|---|
|
|
|
 |
 | Blaine | |
|---|
|
|
|
 |
 | Giovanni | |
|---|
|
|
|
Johto
 |
 | Falkner | |
|---|
|
|
|
 |
 | Bugsy | |
|---|
|
|
|
 |
 | Whitney | |
|---|
|
|
|
 |
 | Morty | |
|---|
|
|
|
 |
 | Chuck | |
|---|
|
|
|
 |
 | Jasmine | |
|---|
|
|
|
 |
 | Pryce | |
|---|
|
|
|
 |
 | Claire | |
|---|
|
|
|
Hoenn
 |
 | Roxanne | |
|---|
|
|
|
 |
 | Brawly | |
|---|
|
|
|
 |
 | Wattson | |
|---|
|
|
|
 |
 | Flannery | |
|---|
|
|
|
 |
 | Norman | |
|---|
|
|
|
 |
 | Winona | |
|---|
|
|
|
 |
 | Tate and Liza | |
|---|
|
|
|
 |
 | Wallace | |
|---|
|
|
|
Move-technique rewards
As a supplementary reward to the gym's badge, most gym-greeters will also give a permanent congratulatory reward to the victorious trainer by imparting move techniques—a TM or move-tutorship access for a move of a type that tallies to the gym's specialistic type. The TM-selling gym-greeters will also offer cumulative-discount bundles of 5 TMs that cost as much as it would require to pay the single-purchase price of the TM four times, effectively discounting the price for 1 of the 5 TMs.
Kanto
| Gym |
Impartation |
Move |
Prices |
| First purchase | Standard | Five |
| Pewter City | TM34 | Bide |  375 375 | 750 | 3,000 |
| Cerulean City | TMError: no local variable "tm" has been set. | Bubblebeam | 750 | 1,500 | 6,000 |
| Vermilion City | TM24 | Thunderbolt | 1,500 | 3,000 | 12,000 |
| Celadon City | TM21 | Mega Drain | 750 | 1,500 | 6,000 |
| Fuchsia City | TM06 | Toxic | 1,000 | 2,000 | 8,000 |
| Saffron City | TM29 | Psychic | 1,500 | 3,000 | 12,000 |
| Cinnabar Island | TM85 | Flamethrower | 1,500 | 3,000 | 12,000 |
| Viridian City | TM26 | Earthquake | 3,000 | 6,000 | 24,000 |
Johto
| Gym |
Impartation |
Move |
Prices |
| First purchase | Standard | Five |
| Violet City | Tutor | Tail Wind | N/A | 10,000 | N/A |
| Azalea Town | TMError: no local variable "tm" has been set. | U-Turn | 1,250 | 2,500 | 10,000 |
| Goldenrod City | Tutor | Covet | N/A | 10,000 | N/A |
| Ecruteak City | Tutor | Ominous Wind | N/A | 10,000 | N/A |
| Cianwood City | Tutor | Drain Punch | N/A | 10,000 | N/A |
| Olivine City | Tutor | Iron Head | N/A | 10,000 | N/A |
| Mahagony Town | TM13 | Ice Beam | 2,000 | 4,000 | 16,000 |
| Blackthorn City | Tutor | Dragon Pulse | N/A | 10,000 | N/A |
Hoenn
| Gym |
Impartation |
Move |
Prices |
| First purchase | Standard | Five |
| Rustboro City | TM89 | Rock Tomb | 1,500 | 3,000 | 12,000 |
| Dewford Town | TM58 | Bulk Up | 1,250 | 2,500 | 10,000 |
| Mauville City | TM24 | Thunderbolt | 1,500 | 3,000 | 12,000 |
| Lavaridge Town | TM100 | Overheat | 3,500 | 7,000 | 28,000 |
| Petalburg City | TM92 | Facade | 1,750 | 3,500 | 14,000 |
| Mossdeep City | TM54 | Calm Mind | 1,000 | 2,000 | 8,000 |
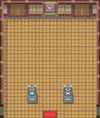
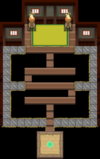
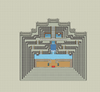
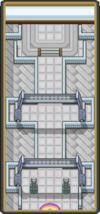
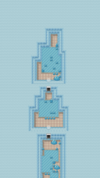
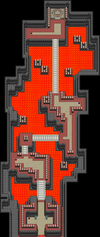
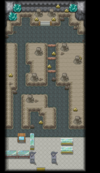
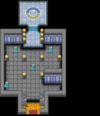
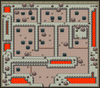
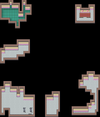
Gym layouts
Kanto
| Kanto Gyms |
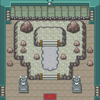 | 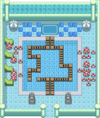 | 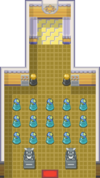 | 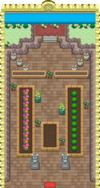 |
| Pewter Gym | Cerulean Gym | Vermilion Gym | Celadon Gym |
 | 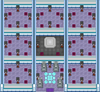 |  |  |
| Fuchsia Gym | Saffron Gym | Cinnabar Gym | Viridian Gym |
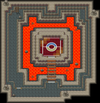
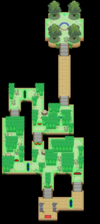
Johto
| Johto Gyms |
 | 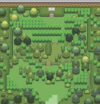 |  |  |
| Violet Gym | Azalea Gym | Goldenrod Gym | Ecruteak Gym |
 |  |  |  |
| Cianwood Gym | Olivine Gym | Mahogany Gym | Blackthorn Gym |
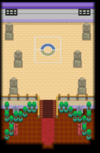
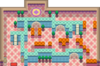
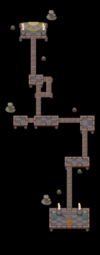
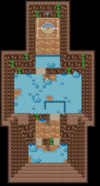
Hoenn
| Hoenn Gyms |
 |  |  |  |
| Rustboro Gym | Dewford Gym | Mauville Gym | Lavaridge Gym |
 |  |  |  |
| Petalburg Gym | Fortree Gym | Mossdeep Gym | Sootopolis Gym |


