Diglett's Cave: Difference between revisions
Created page with "{{Area|Maps=Diglett's Cave Entrance 1,Diglett's Cave Entrance 2,Diglett's Cave|Type=Cave|Location=Route 11|Region=Kanto|DigSpots=8|LandLevels=22}} '''{{PAGENAME}}''' is a K..." |
|||
| (10 intermediate revisions by 4 users not shown) | |||
| Line 1: | Line 1: | ||
{{Area|Maps=Diglett's Cave Entrance 1,Diglett's Cave Entrance 2,Diglett's Cave|Type=Cave|Location=Route 11|Region=Kanto|DigSpots=8|LandLevels=22}} | {{Area|Maps=Diglett's Cave Entrance 1,Diglett's Cave Entrance 2,Diglett's Cave|Type=Cave|Location=Route 11|Region=Kanto|DigSpots=8|LandLevels=22}} | ||
'''{{PAGENAME}}''' is a [[Kanto]] cave that interconnects [[Route 2]] and [[Route 11], providing the most expeditious on-foot pathway therebetween. | '''{{PAGENAME}}''' is a [[Kanto]] cave that interconnects [[Route 2]] and [[Route 11]], providing the most expeditious on-foot pathway therebetween. | ||
This cave becomes immediately accessible by corollary of accessing its eastern-segment route in [[Route 11]], which requires the [[Thunder Badge]] from [[Vermilion Gym]]; before then, the area is inaccessible due to the occlusive trees on [[Route 2]], which the player will not have [[TMs and HMs#|HM01]] ([[Cut]]) to deobstruct early on, and because [[Vermilion City]]'s eastern terminus will be roadblocked by then. | This cave becomes immediately accessible by corollary of accessing its eastern-segment route in [[Route 11]], which requires the [[Thunder Badge]] from [[Vermilion Gym]]; before then, the area is inaccessible due to the occlusive trees on [[Route 2]], which the player will not have [[TMs and HMs#|HM01]] ([[Cut]]) to deobstruct early on, and because [[Vermilion City]]'s eastern terminus will be roadblocked by then. | ||
| Line 12: | Line 12: | ||
<br clear="all"> | <br clear="all"> | ||
==Notable miscellanies== | ==Notable miscellanies== | ||
===[[Stomping Tantrum]] Tutor=== | |||
A [[Move Tutors|Move Tutor]] for the move [[Stomping Tantrum]] can be found near the south end of the southmost bridge, on the way to Brock. He will teach the move to any compatible Pokémon for the price of {{Pdollar}}10,000. | |||
===Brock=== | ===Brock=== | ||
{{Main|Brock (boss)|Brock}} | {{Main|Brock (boss)|Brock}} | ||
{{ | ==Lineup== | ||
===Easy=== | |||
{{BossNPCLineup|Boss=Brock|Lineup= | |||
{{BossPokemon|Name=Aerodactyl|Nature=Naive|Ability=Rock Head|Moveset= | |||
{{NPCMove|Rock Slide}}{{NPCMove|Taunt}}{{NPCMove|Stealth Rock}}{{NPCMove|Explosion}} | |||
}} | |||
{{BossPokemon|Name=Golem|Nature=Jolly|Ability=Sturdy|Moveset= | |||
{{NPCMove|Rock Slide}}{{NPCMove|Bulldoze}}{{NPCMove|Heavy Slam}}{{NPCMove|Sucker Punch}} | |||
}} | |||
{{BossPokemon|Name=Steelix|Nature=Adamant|Ability=Sturdy|Moveset= | |||
{{NPCMove|Iron Head}}{{NPCMove|Dig}}{{NPCMove|Sandstorm}}{{NPCMove|Double-Edge}} | |||
}} | |||
{{BossPokemon|Name=Cradily|Nature=Sassy|Ability=Storm Drain|Moveset= | |||
{{NPCMove|Toxic}}{{NPCMove|Solar Beam}}{{NPCMove|Smack Down}}{{NPCMove|Sludge Wave}} | |||
}} | |||
{{BossPokemon|Name=Toxicroak|Nature=Timid|Ability=Poison Touch|Moveset= | |||
{{NPCMove|Vacuum Wave}}{{NPCMove|Sludge Bomb}}{{NPCMove|Dark Pulse}}{{NPCMove|Round}} | |||
}} | |||
{{BossPokemon|Name=Terrakion|Nature=Jolly|Ability=Justified|Moveset= | |||
{{NPCMove|Sacred Sword}}{{NPCMove|Rock Slide}}{{NPCMove|X-Scissor}}{{NPCMove|Poison Jab}} | |||
}} | |||
}} | |||
===Medium/Hard=== | |||
{{BossNPCLineup|Boss=Brock|Lineup= | |||
{{BossPokemon|Name=Aerodactyl|Nature=Naive|Ability=Rock Head|Item=Focus Sash|Moveset= | |||
{{NPCMove|Stone Edge}}{{NPCMove|Taunt}}{{NPCMove|Fire Blast}}{{NPCMove|Aqua Tail}} | |||
}} | |||
{{BossPokemon|Name=Golem|Nature=Jolly|Ability=Sturdy|Item=Weakness Policy|Moveset= | |||
{{NPCMove|Stone Edge}}{{NPCMove|Rock Polish}}{{NPCMove|Earthquake}}{{NPCMove|Fire Punch}} | |||
}} | |||
{{BossPokemon|Name=Steelix|Nature=Adamant|Ability=Sturdy|Item=Leftovers|Moveset= | |||
{{NPCMove|Earthquake}}{{NPCMove|Heavy Slam}}{{NPCMove|Stone Edge}}{{NPCMove|Ice Fang}} | |||
}} | |||
{{BossPokemon|Name=Cradily|Nature=Sassy|Ability=Storm Drain|Item=Leftovers|Moveset= | |||
{{NPCMove|Seed Bomb}}{{NPCMove|Rock Slide}}{{NPCMove|Toxic}}{{NPCMove|Curse}} | |||
}} | |||
{{BossPokemon|Name=Toxicroak|Nature=Timid|Ability=Poison Touch|Item=Choice Specs|Moveset= | |||
{{NPCMove|Focus Blast}}{{NPCMove|Sludge Bomb}}{{NPCMove|Icy Wind}}{{NPCMove|Dark Pulse}} | |||
}} | |||
{{BossPokemon|Name=Terrakion|Nature=Jolly|Ability=Justified|Item=Expert Belt|Moveset= | |||
{{NPCMove|Close Combat}}{{NPCMove|Stone Edge}}{{NPCMove|Swords Dance}}{{NPCMove|Earthquake}} | |||
}} | |||
}} | |||
==Wild Pokémon== | ==Wild Pokémon== | ||
=== | ===Diglett's Cave Entrance 1=== | ||
==== | {{EVTable|Type=Cave|Contents= | ||
{{AreaLandSpawns|Location=Diglett's Cave Entrance 1}} | {{EVRow|Morning=Morning|Day=Day|Night=Night|Speed=1.11}} | ||
}} | |||
{{AreaLandSpawns|Type=Cave|Location=Diglett's Cave Entrance 1}} | |||
===Diglett's Cave Entrance 2=== | |||
{{EVTable|Contents= | |||
{{EVRow|Morning=Morning|Day=Day|Night=Night|Speed=1.08}} | |||
}} | |||
{{AreaLandSpawns|Location=Diglett's Cave Entrance 2}} | {{AreaLandSpawns|Location=Diglett's Cave Entrance 2}} | ||
===Diglett's Cave=== | |||
====Land==== | |||
{{EVTable|Contents= | |||
{{EVRow|Morning=Morning|Day=Day|Night=Night|Speed=0.72|Def=0.32}} | |||
}} | |||
{{AreaLandSpawns|Location=Diglett's Cave}} | {{AreaLandSpawns|Location=Diglett's Cave}} | ||
===[[Diggable Patches]]=== | ====[[Diggable Patches]]==== | ||
{{AreaDigPokemon|Contents= | {{AreaDigPokemon|Contents= | ||
{{AreaDig|Pokemon=Diglett|Levels= | {{AreaDig|Pokemon=Diglett|Levels=10-20|Rarity=Common}} | ||
{{AreaDig|Pokemon= | {{AreaDig|Pokemon=Dugtrio|Levels=10-20|Rarity=Uncommon}} | ||
{{AreaDig|Pokemon= | {{AreaDig|Pokemon=Drilbur|Levels=10-20|Rarity=Rare|Ms=1}} | ||
}} | }} | ||
| Line 37: | Line 95: | ||
{{AIR|Item=Big Pearl|Cooldown=3 days|Location=The southeastern-segment [[Diggable Patches]]}} | {{AIR|Item=Big Pearl|Cooldown=3 days|Location=The southeastern-segment [[Diggable Patches]]}} | ||
{{AIR|Item=Hyper Potion|Cooldown=3 days|Location=The southeastern-segment [[Diggable Patches]]}} | {{AIR|Item=Hyper Potion|Cooldown=3 days|Location=The southeastern-segment [[Diggable Patches]]}} | ||
{{AIR|Item=Dome Fossil|Cooldown=3 days|Location=The southeastern-segment [[Diggable Patches]]}} | |||
{{AIR|Item=Light Clay|Cooldown=3 days|Location=The southeastern-segment [[Diggable Patches]]}} | {{AIR|Item=Light Clay|Cooldown=3 days|Location=The southeastern-segment [[Diggable Patches]]}} | ||
{{AIR|Item=Flying Gem|Cooldown=3 days|Location=The southeastern-segment [[Diggable Patches]]}} | |||
{{AIR|Item=Great Ball|Cooldown=3 days|Location=The northwestern-segment [[Diggable Patches]]}} | {{AIR|Item=Great Ball|Cooldown=3 days|Location=The northwestern-segment [[Diggable Patches]]}} | ||
{{AIR|Item=Fast Ball|Cooldown=3 days|Location=The northwestern-segment [[Diggable Patches]]}} | |||
{{AIR|Item=Fresh Water|Cooldown=3 days|Location=The northwestern-segment [[Diggable Patches]]}} | |||
{{AIR|Item=Super Potion|Cooldown=3 days|Location=The northwestern-segment [[Diggable Patches]]}} | {{AIR|Item=Super Potion|Cooldown=3 days|Location=The northwestern-segment [[Diggable Patches]]}} | ||
{{AIR|Item=Ultra Ball|Cooldown=3 days|Location=The northwestern-segment [[Diggable Patches]]}} | {{AIR|Item=Ultra Ball|Cooldown=3 days|Location=The northwestern-segment [[Diggable Patches]]}} | ||
| Line 44: | Line 106: | ||
{{AIR|Item=Smooth Rock|Cooldown=3 days|Location=The northwestern-segment [[Diggable Patches]]}} | {{AIR|Item=Smooth Rock|Cooldown=3 days|Location=The northwestern-segment [[Diggable Patches]]}} | ||
}} | }} | ||
===[[Pokéstop]]=== | ===[[Pokéstop]]=== | ||
{{Pokestop|Badge=Rainbow|Type=Cave|Contents= | {{Pokestop|Badge=Rainbow|Type=Cave|Contents= | ||
Latest revision as of 23:51, 5 February 2025
| Diglett's Cave - Kanto | ||||||||||||||||
|
||||||||||||||||
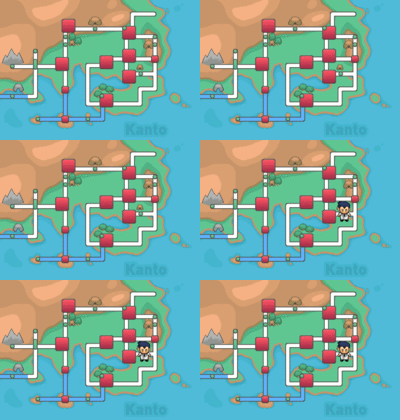
Location  A positional vantage point of Diglett's Cave in Kanto. | ||||||||||||||||
Diglett's Cave is a Kanto cave that interconnects Route 2 and Route 11, providing the most expeditious on-foot pathway therebetween.
This cave becomes immediately accessible by corollary of accessing its eastern-segment route in Route 11, which requires the Thunder Badge from Vermilion Gym; before then, the area is inaccessible due to the occlusive trees on Route 2, which the player will not have HM01 (Cut) to deobstruct early on, and because Vermilion City's eastern terminus will be roadblocked by then.
This cave is bypassable via the digway tunnel that is burrowed one each side of the cave, contingent that both sides have been interacted with.
Because this area incompositely consists of Speed-yielding wild Pokémon, it is considered the best free EV-training area in the game.
Notable miscellanies
Stomping Tantrum Tutor
A Move Tutor for the move Stomping Tantrum can be found near the south end of the southmost bridge, on the way to Brock. He will teach the move to any compatible Pokémon for the price of ![]() 10,000.
10,000.
Brock
- Main article: Brock
Lineup
Easy
|
|
||||||||||||||||||||||||||||||||||||||||||||||||||||||||||||||||||||||||||||
|
|
||||||||||||||||||||||||||||||||||||||||||||||||||||||||||||||||||||||||||||
|
|
||||||||||||||||||||||||||||||||||||||||||||||||||||||||||||||||||||||||||||
| |||||||||||||||||||||||||||||||||||||||||||||||||||||||||||||||||||||||||||||
Medium/Hard
Wild Pokémon
Diglett's Cave Entrance 1
| Times | HP | Atk | Def | SpAtk | SpDef | Speed | ||
|---|---|---|---|---|---|---|---|---|
| Morning | Day | Night | 0 | 0 | 0 | 0 | 0 | 1.11 |
| Values denote the estimated average EV points gained per fight. | ||||||||
| Pokémon | Level range | Times | Held Item | Rarity Tier | |||
|---|---|---|---|---|---|---|---|
| |||||||
Diglett's Cave Entrance 2
| Times | HP | Atk | Def | SpAtk | SpDef | Speed | ||
|---|---|---|---|---|---|---|---|---|
| Morning | Day | Night | 0 | 0 | 0 | 0 | 0 | 1.08 |
| Values denote the estimated average EV points gained per fight. | ||||||||
| Pokémon | Level range | Times | Held Item | Rarity Tier | |||
|---|---|---|---|---|---|---|---|
| |||||||
Diglett's Cave
Land
| Times | HP | Atk | Def | SpAtk | SpDef | Speed | ||
|---|---|---|---|---|---|---|---|---|
| Morning | Day | Night | 0 | 0 | 0.32 | 0 | 0 | 0.72 |
| Values denote the estimated average EV points gained per fight. | ||||||||
| Pokémon | Level range | Times | Held Item | Rarity Tier | |||
|---|---|---|---|---|---|---|---|
| |||||||
| Pokémon | Levels | Rarity | |
|---|---|---|---|
| Diglett | 10-20 | Common | |
| Dugtrio | 10-20 | Uncommon | |
| Drilbur | 10-20 | Rare | |
Items
Natural resources
| Item | Quantity | Cooldown | Location | |
|---|---|---|---|---|
| Pokéball | 1 | 3 days | The southeastern-segment Diggable Patches | |
| Super Potion | 1 | 3 days | The southeastern-segment Diggable Patches | |
| Big Pearl | 1 | 3 days | The southeastern-segment Diggable Patches | |
| Hyper Potion | 1 | 3 days | The southeastern-segment Diggable Patches | |
| Dome Fossil | 1 | 3 days | The southeastern-segment Diggable Patches | |
| Light Clay | 1 | 3 days | The southeastern-segment Diggable Patches | |
| Flying Gem | 1 | 3 days | The southeastern-segment Diggable Patches | |
| Great Ball | 1 | 3 days | The northwestern-segment Diggable Patches | |
| Fast Ball | 1 | 3 days | The northwestern-segment Diggable Patches | |
| Fresh Water | 1 | 3 days | The northwestern-segment Diggable Patches | |
| Super Potion | 1 | 3 days | The northwestern-segment Diggable Patches | |
| Ultra Ball | 1 | 3 days | The northwestern-segment Diggable Patches | |
| Rare Candy | 1 | 3 days | The northwestern-segment Diggable Patches | |
| Smooth Rock | 1 | 3 days | The northwestern-segment Diggable Patches | |
| Required badge | |||||||||||||||||||||||
|
|||||||||||||||||||||||


