| This article has been identified as a stub; its content needs to be either furtherly developed, rewritten, or updated. Read the discussion page for possible information, regardingly. You can help Pokemon Revolution Online Wiki by expanding it. |
Forlorn Court (Dungeon): Difference between revisions
Jump to navigation
Jump to search
rough outline of how I want to structure the page. details to be added later |
No edit summary |
||
| Line 7: | Line 7: | ||
==General information== | ==General information== | ||
*If you are entering the dungeon with a party, the party leader must first close recruitment with the Manager Musharna NPC. Following that, the party leader is able to enter the dungeon and the party members can subsequently enter | *If you are entering the dungeon with a party, the party leader must first close recruitment with the Manager Musharna NPC. Following that, the party leader is able to enter the dungeon and the party members can subsequently enter. | ||
*Up to 5 members are allowed per group and a minimum of 2 are required for a group. Players can also go through the dungeon solo, or even embark on Heroic Mode for a more difficult challenge. | *Up to 5 members are allowed per group and a minimum of 2 are required for a group. Players can also go through the dungeon solo, or even embark on Heroic Mode for a more difficult challenge. | ||
*No items are allowed inside the dungeon and you can only bring in 3 Pokémon at the start. Later on, you can unlock a 4th party slot(a 5th slot is available for Solo mode). | *No items are allowed inside the dungeon and you can only bring in 3 Pokémon at the start. Later on, you can unlock a 4th party slot(a 5th slot is available for Solo mode). | ||
==Forlorn Grand Hall== | ==Forlorn Grand Hall== | ||
This is the first major room in the Dungeon and essentially the hub of all the major rooms. From this room, you can access the 4 elemental portals, the fountain where you can heal, the Vaporeon | This is the first major room in the Dungeon and essentially the hub of all the major rooms. From this room, you can access the 4 elemental portals, the fountain where you can heal, the Vaporeon NPC where you can purchase items, and the door to the next boss room that's blocked by the first dungeon boss, Unknown Shade. There are many roaming [[Noivern]] in the room that will battle you if spotted, along with a pair of [[Haxorus]]' standing still at the staircases that will also battle you. In addition to that, the [[Hydreigon]] statues will initiate a battle if you walk directly in front of them. | ||
===Notable NPCs=== | ===Notable NPCs=== | ||
*Fountain: | *Fountain: | ||
*Beheeyem: The Beeheeyem standing next to the Grand Hall's exit will offer the player either 5 Glitter | |||
*Beheeyem: The Beeheeyem standing next to the Grand Hall's exit will offer the player either 5 Glitter. Glitter is a type of currency exclusive to the Forlorn Court Dungeon. It can be used to exchange for various perks to the Beeheeyem outside the dungeon.If you are running the dungeon by yourself, you will also receive the option of claiming 6 [[Ether]](these will be [[Elixir]]s if you have gotten the Enhanced Ether buff from Beeheeyem). If you are running the dungeon as a duo, you will each get 3 [[Ether]](these will be [[Elixir]]s if you have gotten the Enhanced Ether buff from Beeheeyem). If you are running the dungeon with a party of 3 or more, neither Ether nor Elixirs will be offered. | |||
*Vaporeon: | *Vaporeon: | ||
In order to clear this room and move on to the boss room, you must defeat all 5 [[Rotom]] forms and then the room boss. | |||
In order to clear this room and move on to the boss room, you must defeat all 5 [[Rotom]] forms and then the room boss. All the [[Rotom]] battles will consist of a [[Dusclops]] and the respective Rotom form, with the exception of Rotom-Heat, which will be be a [[Spiritomb]] instead of a [[Dusclops]]. | |||
<gallery> | <gallery> | ||
Rotom_fan.png|'''Rotom Fan''' found in the top right of the room | Rotom_fan.png|'''Rotom Fan''' found in the top right of the room | ||
| Line 26: | Line 30: | ||
Rotom_wash.png|'''Rotom Wash''' found in the bottom right of the room | Rotom_wash.png|'''Rotom Wash''' found in the bottom right of the room | ||
</gallery> | </gallery> | ||
Once those five have been defeated, Unknown Shade will be ready to battle. | Once those five have been defeated, Unknown Shade will be ready to battle. | ||
{{BossNPCLineup|Boss=Unknown Shade|Lineup= | |||
{{BossNPCLineup|Boss=Unknown Shade (Normal)|Lineup= | |||
{{BossPokemon|Name=Arbok|Nature=|Ability|Item=Black Sludge|Moveset= | {{BossPokemon|Name=Arbok|Nature=|Ability|Item=Black Sludge|Moveset= | ||
{{NPCMove|Gunk Shot}}{{NPCMove|Earthquake}}{{NPCMove|}}{{NPCMove|}} | {{NPCMove|Gunk Shot}}{{NPCMove|Earthquake}}{{NPCMove|}}{{NPCMove|}} | ||
}} | }} | ||
{{BossPokemon|Name=Aegislash|Nature=|Ability|Moveset= | {{BossPokemon|Name=Aegislash|Nature=|Ability|Moveset= | ||
{{NPCMove|Magnet Rise}}{{NPCMove|}}{{NPCMove|}}{{NPCMove|}} | {{NPCMove|Magnet Rise}}{{NPCMove|King's Shield}}{{NPCMove|}}{{NPCMove|}} | ||
}} | }} | ||
{{BossPokemon|Name=Gengar|Nature=|Ability|Moveset= | {{BossPokemon|Name=Gengar|Nature=|Ability|Moveset= | ||
{{NPCMove|Shadow Ball}}{{NPCMove|}}{{NPCMove|}}{{NPCMove|}}}}}} | {{NPCMove|Shadow Ball}}{{NPCMove|Sludge Wave}}{{NPCMove|}}{{NPCMove|}}}}}} | ||
{{BossNPCLineup|Boss=Unknown Shade (Heroic)|Lineup= | |||
{{BossPokemon|Name=Heracross|Nature|Ability|Moveset= | |||
{{NPCMove|}}{{NPCMove|}}{{NPCMove|}}{{NPCMove|}} | |||
}} | |||
{{BossPokemon|Name=Lapras|Nature|Ability|Moveset= | |||
{{NPCMove|Rest}}{{NPCMove|Block}}{{NPCMove|Perish Song}}{{NPCMove|}} | |||
}} | |||
{{BossPokemon|Name=Aegislash|Nature|Ability|Moveset= | |||
{{NPCMove|King's Shield}}{{NPCMove|}}{{NPCMove|}}{{NPCMove|}} | |||
}} | |||
{{BossPokemon|Name=Gengar|Form=Mega|Nature|Ability|Moveset= | |||
{{NPCMove|Shadow Ball}}{{NPCMove|Sludge Wave}}{{NPCMove|Hypnosis}}{{NPCMove|}} | |||
}}}} | |||
==Elemental Portals== | ==Elemental Portals== | ||
| Line 44: | Line 64: | ||
==Forlorn Boss Room== | ==Forlorn Boss Room== | ||
When you enter this room, you will find a Gardevoir standing in the middle of the room, speak with it and then 9 Gardevoir will scatter throughout the room. You need look around and battle the newly spawned Gardevoir until you find the real one to make the boss spawn in the middle of the room. After finding the real one, you will have to battle the second boss of the dungeon. | |||
{{BossNPCLineup|Boss=Mistress of the Manse (Normal)|Lineup= | |||
{{BossPokemon|Name=Gardevoir|Nature|Ability|Moveset= | |||
{{NPCMove|Psychic}}{{NPCMove|Moonblast}}{{NPCMove|}}{{NPCMove|}} | |||
}}}} | |||
{{BossNPCLineup|Boss=Mistress of the Manse (Heroic)|Lineup= | |||
{{BossPokemon|Name=Gardevoir|Form=Mega|Nature=|Ability=|Moveset= | |||
{{NPCMove|Psyshock}}{{NPCMove|}}{{NPCMove|}}{{NPCMove|}} | |||
}}}} | |||
After defeating the Mistress of the Manse, 4 Crobats will spawn, each battle will have 2 Crobats(3 on Heroic). Following their defeat, the third dungeon boss will spawn, Master of the Manse. | |||
{{BossNPCLineup|Boss=Master of the Manse (Normal)|Lineup= | |||
{{BossPokemon|Name=Gallade|Nature|Ability|Moveset= | |||
{{NPCMove|Close Combat}}{{NPCMove|Swords Dance}}{{NPCMove|Leaf Blade}}{{NPCMove|}} | |||
}}}} | |||
{{BossNPCLineup|Boss=Master of the Manse (Heroic)|Lineup= | |||
{{BossPokemon|Name=Gallade|Nature|Ability|Moveset= | |||
{{NPCMove|Close Combat}}{{NPCMove|Swords Dance}}{{NPCMove|}}{{NPCMove|}} | |||
}}}} | |||
<br clear="all"> | |||
After defeating the Shadow Guardians, if that applies to your group, you will need to head north along the central path and you will run into a group of [[Bisharp]]. You will need to defeat the Bisharp to proceed, but defeating all of them is not necessary. Simply clear a way by defeating a single column to get passed them. By doing so, you will have made it to where the final dungeon bosses are. | |||
{{BossNPCLineup|Boss=Gardevoir|Lineup= | |||
{{BossPokemon|Name=Gardevoir|Nature|Ability|Moveset= | |||
{{NPCMove|}}{{NPCMove|}}{{NPCMove|}}{{NPCMove|}} | |||
}}}} | |||
{{BossNPCLineup|Boss=Gallade|Lineup= | |||
{{BossPokemon|Name=Gallade|Nature|Ability|Moveset= | |||
{{NPCMove|}}{{NPCMove|Swords Dance}}{{NPCMove|}}{{NPCMove|}} | |||
}}}} | |||
==Rewards== | ==Rewards (Normal Mode)== | ||
Depending on your score, the rewards you receive may vary. Players can earn [[PvE Coins]] and a Heroic Sigil. In addition to that, players can receive items from the list below. There is also a chance for some Pokémon to spawn as a reward for clearing the dungeon; the list of which Pokémon can spawn is also below. | Depending on your score, the rewards you receive may vary. Players can earn [[PvE Coins]] and a Heroic Sigil. In addition to that, players can receive items from the list below. There is also a chance for some Pokémon to spawn as a reward for clearing the dungeon; the list of which Pokémon can spawn is also below. | ||
{{ItemsTable|Contents= | {{ItemsTable|Contents= | ||
| Line 63: | Line 120: | ||
}} | }} | ||
==Heroic Mode== | ==Rewards (Heroic Mode)== | ||
{{PokemonTable|Contents= | |||
{{PTRow|Pokemon=Ralts}} | |||
}} | |||
== | {{ItemsTable|Contents= | ||
{{ITRow|Item=Reroll Shard|Quantity=}}}} | |||
[[Category:Repeatable tasks]] | [[Category:Repeatable tasks]] | ||
Latest revision as of 21:46, 26 August 2024
| Forlorn Court (Dungeon) - Kanto | |||||||||||||
Overview .png) |
|||||||||||||
|
|||||||||||||
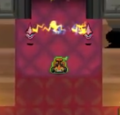
This dungeon is accessible in Forlorn Court.
General information
- If you are entering the dungeon with a party, the party leader must first close recruitment with the Manager Musharna NPC. Following that, the party leader is able to enter the dungeon and the party members can subsequently enter.
- Up to 5 members are allowed per group and a minimum of 2 are required for a group. Players can also go through the dungeon solo, or even embark on Heroic Mode for a more difficult challenge.
- No items are allowed inside the dungeon and you can only bring in 3 Pokémon at the start. Later on, you can unlock a 4th party slot(a 5th slot is available for Solo mode).
Forlorn Grand Hall
This is the first major room in the Dungeon and essentially the hub of all the major rooms. From this room, you can access the 4 elemental portals, the fountain where you can heal, the Vaporeon NPC where you can purchase items, and the door to the next boss room that's blocked by the first dungeon boss, Unknown Shade. There are many roaming Noivern in the room that will battle you if spotted, along with a pair of Haxorus' standing still at the staircases that will also battle you. In addition to that, the Hydreigon statues will initiate a battle if you walk directly in front of them.
Notable NPCs
- Fountain:
- Beheeyem: The Beeheeyem standing next to the Grand Hall's exit will offer the player either 5 Glitter. Glitter is a type of currency exclusive to the Forlorn Court Dungeon. It can be used to exchange for various perks to the Beeheeyem outside the dungeon.If you are running the dungeon by yourself, you will also receive the option of claiming 6 Ether(these will be Elixirs if you have gotten the Enhanced Ether buff from Beeheeyem). If you are running the dungeon as a duo, you will each get 3 Ether(these will be Elixirs if you have gotten the Enhanced Ether buff from Beeheeyem). If you are running the dungeon with a party of 3 or more, neither Ether nor Elixirs will be offered.
- Vaporeon:
In order to clear this room and move on to the boss room, you must defeat all 5 Rotom forms and then the room boss. All the Rotom battles will consist of a Dusclops and the respective Rotom form, with the exception of Rotom-Heat, which will be be a Spiritomb instead of a Dusclops.
-
 Rotom Fan found in the top right of the room
 -
 Rotom Frost found in the bottom left of the room
 -
 Rotom Heat found in the top left of the room
 -
 Rotom Mow found in the upper middle of the room
 -
 Rotom Wash found in the bottom right of the room


Once those five have been defeated, Unknown Shade will be ready to battle.
Unknown Shade (Normal)'s Lineup
| |||||||||||||||||||||||||||||||||||||||||||||||||||||||||||||||||||||||||||||
|---|---|---|---|---|---|---|---|---|---|---|---|---|---|---|---|---|---|---|---|---|---|---|---|---|---|---|---|---|---|---|---|---|---|---|---|---|---|---|---|---|---|---|---|---|---|---|---|---|---|---|---|---|---|---|---|---|---|---|---|---|---|---|---|---|---|---|---|---|---|---|---|---|---|---|---|---|---|
|
|
||||||||||||||||||||||||||||||||||||||||||||||||||||||||||||||||||||||||||||
|
|||||||||||||||||||||||||||||||||||||||||||||||||||||||||||||||||||||||||||||
| |||||||||||||||||||||||||||||||||||||||||||||||||||||||||||||||||||||||||||||


Unknown Shade (Heroic)'s Lineup
| |||||||||||||||||||||||||||||||||||||||||||||||||||||||||||||||||||||||||||||
|---|---|---|---|---|---|---|---|---|---|---|---|---|---|---|---|---|---|---|---|---|---|---|---|---|---|---|---|---|---|---|---|---|---|---|---|---|---|---|---|---|---|---|---|---|---|---|---|---|---|---|---|---|---|---|---|---|---|---|---|---|---|---|---|---|---|---|---|---|---|---|---|---|---|---|---|---|---|
|
|
||||||||||||||||||||||||||||||||||||||||||||||||||||||||||||||||||||||||||||
|
|
||||||||||||||||||||||||||||||||||||||||||||||||||||||||||||||||||||||||||||
| |||||||||||||||||||||||||||||||||||||||||||||||||||||||||||||||||||||||||||||


Elemental Portals
Forlorn Caldera
Forlorn Thicket
Forlorn Dread
Forlorn Mire
Forlorn Boss Room
When you enter this room, you will find a Gardevoir standing in the middle of the room, speak with it and then 9 Gardevoir will scatter throughout the room. You need look around and battle the newly spawned Gardevoir until you find the real one to make the boss spawn in the middle of the room. After finding the real one, you will have to battle the second boss of the dungeon.
Mistress of the Manse (Normal)'s Lineup
| ||||||||||||||||||||||||||||||||||||||
|---|---|---|---|---|---|---|---|---|---|---|---|---|---|---|---|---|---|---|---|---|---|---|---|---|---|---|---|---|---|---|---|---|---|---|---|---|---|---|
|
||||||||||||||||||||||||||||||||||||||
| ||||||||||||||||||||||||||||||||||||||

Mistress of the Manse (Heroic)'s Lineup
| ||||||||||||||||||||||||||||||||||||||
|---|---|---|---|---|---|---|---|---|---|---|---|---|---|---|---|---|---|---|---|---|---|---|---|---|---|---|---|---|---|---|---|---|---|---|---|---|---|---|
|
||||||||||||||||||||||||||||||||||||||
| ||||||||||||||||||||||||||||||||||||||

After defeating the Mistress of the Manse, 4 Crobats will spawn, each battle will have 2 Crobats(3 on Heroic). Following their defeat, the third dungeon boss will spawn, Master of the Manse.
Master of the Manse (Normal)'s Lineup
| ||||||||||||||||||||||||||||||||||||||
|---|---|---|---|---|---|---|---|---|---|---|---|---|---|---|---|---|---|---|---|---|---|---|---|---|---|---|---|---|---|---|---|---|---|---|---|---|---|---|
|
||||||||||||||||||||||||||||||||||||||
| ||||||||||||||||||||||||||||||||||||||

Master of the Manse (Heroic)'s Lineup
| ||||||||||||||||||||||||||||||||||||||
|---|---|---|---|---|---|---|---|---|---|---|---|---|---|---|---|---|---|---|---|---|---|---|---|---|---|---|---|---|---|---|---|---|---|---|---|---|---|---|
|
||||||||||||||||||||||||||||||||||||||
| ||||||||||||||||||||||||||||||||||||||
After defeating the Shadow Guardians, if that applies to your group, you will need to head north along the central path and you will run into a group of Bisharp. You will need to defeat the Bisharp to proceed, but defeating all of them is not necessary. Simply clear a way by defeating a single column to get passed them. By doing so, you will have made it to where the final dungeon bosses are.
Gardevoir's Lineup
| ||||||||||||||||||||||||||||||||||||||
|---|---|---|---|---|---|---|---|---|---|---|---|---|---|---|---|---|---|---|---|---|---|---|---|---|---|---|---|---|---|---|---|---|---|---|---|---|---|---|
|
||||||||||||||||||||||||||||||||||||||
| ||||||||||||||||||||||||||||||||||||||
Gallade's Lineup
| ||||||||||||||||||||||||||||||||||||||
|---|---|---|---|---|---|---|---|---|---|---|---|---|---|---|---|---|---|---|---|---|---|---|---|---|---|---|---|---|---|---|---|---|---|---|---|---|---|---|
|
||||||||||||||||||||||||||||||||||||||
| ||||||||||||||||||||||||||||||||||||||
Rewards (Normal Mode)
Depending on your score, the rewards you receive may vary. Players can earn PvE Coins and a Heroic Sigil. In addition to that, players can receive items from the list below. There is also a chance for some Pokémon to spawn as a reward for clearing the dungeon; the list of which Pokémon can spawn is also below.
| Item | Quantity | |
|---|---|---|
| Big Mushroom | ||
| Nugget | 1-2 | |
| Reroll Shard | 1 | |
| Pokédex Number | Pokémon | Type 1 | Type 2 | Rarity Tier | Held Item | |
|---|---|---|---|---|---|---|
| #371 | Bagon | Dragon | Rare | |||
| #092 | Gastly | Ghost | Poison | Common | ||
| #228 | Houndour | Dark | Fire | Rare | ||
| #479 | Rotom | Electric | Ghost | Rare | ||
| #079 | Slowpoke | Water | Psychic | Common | ||
| #252 | Treecko | Grass | Rare | |||
Rewards (Heroic Mode)
| Pokédex Number | Pokémon | Type 1 | Type 2 | Rarity Tier | Held Item | |
|---|---|---|---|---|---|---|
| #280 | Ralts | Psychic | Fairy | Rare | ||
| Item | Quantity | |
|---|---|---|
| Reroll Shard | ||