S.S. Anne: Difference between revisions
Created page with "{{Area|Maps=S.S. Anne Basement,S.S. Anne 1F,S.S. Anne 2F,S.S. Anne Kitchen,S.S. Anne Ballroom,S.S. Anne Captain's Office|Location=Vermilion City|Type=Water|Region=Kanto|Battle..." |
m Text replacement - "gym" to "Gym" |
||
| (22 intermediate revisions by 8 users not shown) | |||
| Line 1: | Line 1: | ||
{{Area|Maps=S.S. Anne Basement,S.S. Anne 1F,S.S. Anne 2F,S.S. Anne Kitchen,S.S. Anne Ballroom,S.S. Anne Captain's Office|Location=Vermilion City|Type=Water|Region=Kanto|BattleNPCs= | {{Area|Maps=S.S. Anne Basement,S.S. Anne 1F,S.S. Anne 2F,S.S. Anne Kitchen,S.S. Anne Ballroom,S.S. Anne Captain's Office,S.S. Anne 3F Battle Room|Location=Vermilion City|Type=Water|Region=Kanto|North=Vermilion City|BattleNPCs=30|Items=8}} | ||
'''{{PAGENAME}}''' is an upscale excursionistic ship that docks into [[Vermilion City#Vermilion Harbor|Vermilion Harbor]]. | '''{{PAGENAME}}''' is an upscale excursionistic ship that docks into [[Vermilion City#Vermilion Harbor|Vermilion Harbor]]. | ||
| Line 5: | Line 5: | ||
It can be embarked on from Vermilion Harbor as soon as the player obtains the S.S. Anne ticket bequeathed by Bill upon completing his mini-task on [[Route 25]], as well as the [[Cascade Badge]] from [[Cerulean Gym]] to access [[Vermilion City]]. | It can be embarked on from Vermilion Harbor as soon as the player obtains the S.S. Anne ticket bequeathed by Bill upon completing his mini-task on [[Route 25]], as well as the [[Cascade Badge]] from [[Cerulean Gym]] to access [[Vermilion City]]. | ||
This is the domain of the [[S.S. Anne (quest)|eponymous quest]] that is required to obtain [[TMs and HMs#HMs|HM01]] ([[Cut]]), as the quest's control flow is mostly confined within this ship. Once the rewarded Cut HM is procured, [[Vermilion Gym]] will become immediately accessible by virtue of the fact that this HM is needed to deobstruct the otherwise | This is the domain of the [[S.S. Anne (quest)|eponymous quest]] that is required to obtain [[TMs and HMs#HMs|HM01]] ([[Cut]]), as the quest's control flow is mostly confined within this ship. Once the rewarded Cut HM is procured, [[Vermilion Gym]] will become immediately accessible by virtue of the fact that this HM is needed to deobstruct the otherwise roadblocking tree nearby the Gym. | ||
Once the quest is complete and the ship has been vacated, this area will no longer be accessible; as such, it is considered prudent to maximize all the obtainable resources on this ship, such as experience and monetary payouts from battle NPCs, lootable items, seen-data entries for the [[Pokédex]], and so forth. | Once the quest is complete and the ship has been vacated, this area will no longer be accessible; as such, it is considered prudent to maximize all the obtainable resources on this ship, such as experience and monetary payouts from battle NPCs, lootable items, seen-data entries for the [[Pokédex]], and so forth. | ||
| Line 12: | Line 12: | ||
==Notable miscellanies== | ==Notable miscellanies== | ||
===Beverage-vendor=== | ===Beverage-vendor=== | ||
In the ballroom, Drink Waiter Dan will | In the ballroom, Drink Waiter Dan will offer the following beverages. | ||
{{ShopTable|Contents= | {{ShopTable|Name=Beverages|Contents= | ||
{{ShopItem|Item=Fresh Water|Price=200}} | {{ShopItem|Item=Fresh Water|Price=200}} | ||
{{ShopItem|Item=Soda Pop|Price=300}} | {{ShopItem|Item=Soda Pop|Price=300}} | ||
| Line 21: | Line 21: | ||
{{ShopItem|Item=Berry Juice|Price=1,500}} | {{ShopItem|Item=Berry Juice|Price=1,500}} | ||
}} | }} | ||
===Player's bedroom=== | ===Player's bedroom=== | ||
In the bedroom, you can heal your Pokémon by using the bed therein; this denecessitates [[Pokémon Center]] trips, thereby sparing you travels outside of this ship despite depletion from the glut of NPCs aboard. | In the bedroom, you can heal your Pokémon by using the bed therein; this denecessitates [[Pokémon Center]] trips, thereby sparing you travels outside of this ship despite depletion from the glut of NPCs aboard. | ||
| Line 27: | Line 28: | ||
{{AreaItems|Type=Water|Contents= | {{AreaItems|Type=Water|Contents= | ||
{{AIR|Item=Fresh Water|Cooldown=7 days|Location=Given by Matt nearby the trash-can bin in Room 7 on the first floor}} | {{AIR|Item=Fresh Water|Cooldown=7 days|Location=Given by Matt nearby the trash-can bin in Room 7 on the first floor}} | ||
{{AIR|Item=Chesto Berry|Cooldown=5 days|Location= | {{AIR|Item=Chesto Berry|Cooldown=5 days|Location=Hidden Item. On the table in Room 6 on the first floor}} | ||
{{AIR|Item=Great Ball|Cooldown=7 days|Location= | {{AIR|Item=Great Ball|Cooldown=7 days|Location=Hidden Item. Topmost trash-can bin in the kitchen}} | ||
{{AIR|Item=Pecha Berry|Location= | {{AIR|Item=Pecha Berry|Cooldown=Instant|Location=Hidden Item. Middle trash-can bin in the kitchen. Can only be looted if there is none in the inventory, and can be looted multiple times}} | ||
{{AIR|Item= | {{AIR|Item=Hyper Potion|Cooldown=7 days|Location=Hidden Item. Bottommost trash-can bin in the kitchen}} | ||
{{AIR|Item= | {{AIR|Item=Leftovers|Cooldown=3 days|Location=Hidden Item. It is lootable from the trash-can bin on the second-floor hallway}} | ||
{{AIR|Item= | {{AIR|Item=Chesto Berry|Location=Hidden Item. Trash-can bin on the south-west of the lower floor of the Ballroom}} | ||
{{AIR|Item=Leppa Berry|Location=Hidden Item. 3rd Trash-can bin from the west in the south of the lower floor of the Ballroom}} | |||
{{AIR|Item=Oran Berry|Location=Hidden Item. Trash-can bin at the very south of the Ballroom}} | |||
{{AIR|HM=Cut|Location=Rewarded by the captain in his office upon completion of the area's [[S.S. Anne (quest)|questwork]]}} | {{AIR|HM=Cut|Location=Rewarded by the captain in his office upon completion of the area's [[S.S. Anne (quest)|questwork]]}} | ||
}} | }} | ||
| Line 40: | Line 43: | ||
{{NPCTable|Location={{PAGENAME}} B1F|Type=Water|Contents= | {{NPCTable|Location={{PAGENAME}} B1F|Type=Water|Contents= | ||
{{NPCTrainer|Class=Old Man|Name=Fred|Lineup= | {{NPCTrainer|Class=Old Man|Name=Fred|Lineup= | ||
{{NPCLineup|Pokemon=Voltorb|Levels= | {{NPCLineup|Pokemon=Voltorb|Levels=24}} | ||
}} | }} | ||
{{NPCTrainer|Class=Lass|Name=Jenna|Lineup= | {{NPCTrainer|Class=Lass|Name=Jenna|Gender=Picnicker|Lineup= | ||
{{NPCLineup|Pokemon=Igglybuff,Snubbull|Levels= | {{NPCLineup|Pokemon=Igglybuff,Snubbull|Levels=20,20}} | ||
}} | }} | ||
{{NPCTrainer|Class=Youngster|Name=Steve|Lineup= | {{NPCTrainer|Class=Youngster|Name=Steve|Lineup= | ||
{{NPCLineup|Pokemon=Bulbasaur|Levels= | {{NPCLineup|Pokemon=Bulbasaur|Levels=25}} | ||
}} | }} | ||
{{NPCTrainer|Class=Youngster|Name=Stevie|Lineup= | {{NPCTrainer|Class=Youngster|Name=Stevie|Lineup= | ||
{{NPCLineup|Pokemon=Charmander|Levels= | {{NPCLineup|Pokemon=Charmander|Levels=25}} | ||
}} | }} | ||
{{NPCTrainer|Class=Youngster|Name=Steven|Lineup= | {{NPCTrainer|Class=Youngster|Name=Steven|Lineup= | ||
{{NPCLineup|Pokemon=Squirtle|Levels= | {{NPCLineup|Pokemon=Squirtle|Levels=25}} | ||
}} | }} | ||
{{NPCTrainer|Class=Youngster|Name=Charlie|Lineup= | {{NPCTrainer|Class=Youngster|Name=Charlie|Gender=man|Lineup= | ||
{{NPCLineup|Pokemon=Growlithe,Spearow|Levels= | {{NPCLineup|Pokemon=Growlithe,Spearow|Levels=21,22}} | ||
}} | }} | ||
}} | }} | ||
===1F=== | ===1F=== | ||
{{NPCTable|Location={{PAGENAME}} 1F|Type=Water|Contents= | {{NPCTable|Location={{PAGENAME}} 1F|Type=Water|Contents= | ||
{{NPCTrainer|Class=Blackbelt|Name=Toby|Lineup= | {{NPCTrainer|Class=Blackbelt|Name=Toby|Lineup= | ||
{{NPCLineup|Pokemon=Hitmonlee,Hitmonchan|Levels= | {{NPCLineup|Pokemon=Hitmonlee,Hitmonchan|Levels=22,22}} | ||
}} | }} | ||
{{NPCTrainer|Class=Blackbelt|Name=Josh|Lineup= | {{NPCTrainer|Class=Blackbelt|Name=Josh|Lineup= | ||
{{NPCLineup|Pokemon= | {{NPCLineup|Pokemon=Throh,Sawk|Levels=22,22 | ||
}} | |||
}} | }} | ||
{{NPCTrainer|Class=Blackbelt|Name=Jose|Lineup= | {{NPCTrainer|Class=Blackbelt|Name=Jose|Lineup= | ||
{{NPCLineup|Pokemon=Golduck | {{NPCLineup|Pokemon=Mankey,Golduck|Levels=23,21}} | ||
}} | }} | ||
{{NPCTrainer|Class=Blackbelt|Name=Kiroro|Lineup= | {{NPCTrainer|Class=Blackbelt|Name=Kiroro|Lineup= | ||
{{NPCLineup|Pokemon=Machamp|Levels= | {{NPCLineup|Pokemon=Machamp|Levels=25}} | ||
}} | }} | ||
{{NPCTrainer|Class=Old Man|Name=George|Lineup= | {{NPCTrainer|Class=Old Man|Name=George|Lineup= | ||
{{NPCLineup|Pokemon=Snorlax|Levels= | {{NPCLineup|Pokemon=Snorlax|Levels=24}} | ||
}} | }} | ||
{{NPCTrainer|Class=Youngster|Name=Bro|Lineup= | {{NPCTrainer|Class=Youngster|Name=Bro|Lineup= | ||
{{NPCLineup|Pokemon=Rattata|Levels= | {{NPCLineup|Pokemon=Rattata|Levels=24}} | ||
}} | }} | ||
{{NPCTrainer|Class=Youngster|Name=Broheman|Lineup= | {{NPCTrainer|Class=Youngster|Name=Broheman|Lineup= | ||
{{NPCLineup|Pokemon=Rattata|Levels= | {{NPCLineup|Pokemon=Rattata|Levels=24}} | ||
}} | }} | ||
{{NPCTrainer|Class=Youngster|Name=Broseph|Lineup= | {{NPCTrainer|Class=Youngster|Name=Broseph|Lineup= | ||
{{NPCLineup|Pokemon=Rattata|Levels= | {{NPCLineup|Pokemon=Rattata|Levels=24}} | ||
}} | }} | ||
{{NPCTrainer|Class=Youngster|Name=Brotato|Lineup= | {{NPCTrainer|Class=Youngster|Name=Brotato|Lineup= | ||
{{NPCLineup|Pokemon=Rattata|Levels= | {{NPCLineup|Pokemon=Rattata|Levels=24}} | ||
}} | }} | ||
{{NPCTrainer|Class=Pokémaniac|Name=Jimmy|Lineup= | {{NPCTrainer|Class=Pokémaniac|Name=Jimmy|Gender=Office Worker|Lineup= | ||
{{NPCLineup|Pokemon=Jigglypuff,Pikachu|Levels= | {{NPCLineup|Pokemon=Jigglypuff,Pikachu|Levels=24,25}} | ||
}} | }} | ||
{{NPCTrainer|Class=Lass|Name=Stephany|Lineup= | {{NPCTrainer|Class=Lass|Name=Stephany|Gender=Picnicker|Lineup= | ||
{{NPCLineup|Pokemon= | {{NPCLineup|Pokemon=Nidorina,Illumise|Levels=24,25}} | ||
}} | }} | ||
{{NPCTrainer|Class=Youngster|Name=Steve|Lineup= | {{NPCTrainer|Class=Youngster|Name=Steve|Gender=Camper|Lineup= | ||
{{NPCLineup|Pokemon= | {{NPCLineup|Pokemon=Nidorino,Volbeat|Levels=23,24}} | ||
}} | }} | ||
{{NPCTrainer|Class=Pokémaniac|Name=Jeff|Lineup= | {{NPCTrainer|Class=Pokémaniac|Name=Jeff|Gender=Scientist|Lineup= | ||
{{NPCLineup|Pokemon= | {{NPCLineup|Pokemon=Bidoof,Trubbish|Levels=21,23}} | ||
}} | }} | ||
{{NPCTrainer|Class=Fisherman|Name=Mike|Lineup= | {{NPCTrainer|Class=Fisherman|Name=Mike|Lineup= | ||
{{NPCLineup|Pokemon= | {{NPCLineup|Pokemon=Makuhita,Timburr,Machoke|Levels=22,23,24}} | ||
}} | }} | ||
}} | }} | ||
| Line 107: | Line 112: | ||
{{NPCTable|Location={{PAGENAME}} 2F|Type=Water|Contents= | {{NPCTable|Location={{PAGENAME}} 2F|Type=Water|Contents= | ||
{{NPCTrainer|Class=Gentleman|Name=Nick|Lineup= | {{NPCTrainer|Class=Gentleman|Name=Nick|Lineup= | ||
{{NPCLineup|Pokemon=Growlithe,Growlithe|Levels= | {{NPCLineup|Pokemon=Growlithe,Growlithe|Levels=25,25}} | ||
}} | }} | ||
{{NPCTrainer|Class=Gentleman|Name=Walter|Lineup= | {{NPCTrainer|Class=Gentleman|Name=Walter|Lineup= | ||
{{NPCLineup|Pokemon=Persian,Cubone|Levels= | {{NPCLineup|Pokemon=Persian,Cubone|Levels=24,24}} | ||
}} | }} | ||
{{NPCTrainer|Class= | {{NPCTrainer|Class=Lady|Name=Taylor|Gender=Shaman|Lineup= | ||
{{NPCLineup|Pokemon=Ponyta, | {{NPCLineup|Pokemon=Ponyta,Petilil|Levels=23,24}} | ||
}} | }} | ||
{{NPCTrainer|Class=Sailor|Name=Austin|Lineup= | {{NPCTrainer|Class=Sailor|Name=Austin|Lineup= | ||
{{NPCLineup|Pokemon= | {{NPCLineup|Pokemon=Kingler,Machoke|Levels=24,26}} | ||
}} | }} | ||
{{NPCTrainer|Class=Sailor|Name=Arthur|Lineup= | {{NPCTrainer|Class=Sailor|Name=Arthur|Lineup= | ||
{{NPCLineup|Pokemon=Tentacool,Shellder,Krabby|Levels= | {{NPCLineup|Pokemon=Tentacool,Shellder,Krabby|Levels=24,24,26}} | ||
}} | }} | ||
{{NPCTrainer|Class=Sailor|Name=Joey|Lineup= | {{NPCTrainer|Class=Sailor|Name=Joey|Notes=This trainer gives the TM19 (Seismic Toss) after defeating him|Lineup= | ||
{{NPCLineup|Pokemon= | {{NPCLineup|Pokemon=Makuhita,Poliwhirl|Levels=25,26}} | ||
}} | }} | ||
{{NPCTrainer|Class=Youngster|Name=Ron|Lineup= | {{NPCTrainer|Class=Youngster|Name=Ron|Gender=man|Lineup= | ||
{{NPCLineup|Pokemon=Rattata,Pidgeotto,Pikachu|Levels= | {{NPCLineup|Pokemon=Rattata,Pidgeotto,Pikachu|Levels=25,26,27}} | ||
}} | }} | ||
}} | }} | ||
| Line 132: | Line 137: | ||
{{NPCTable|Location={{PAGENAME}} 3F Battleroom|Type=Water|Contents= | {{NPCTable|Location={{PAGENAME}} 3F Battleroom|Type=Water|Contents= | ||
{{NPCTrainer|Class=Youngster|Name=Sam|Lineup= | {{NPCTrainer|Class=Youngster|Name=Sam|Lineup= | ||
{{NPCLineup|Pokemon=Venonat,Rhyhorn|Levels= | {{NPCLineup|Pokemon=Venonat,Rhyhorn|Levels=25,26}} | ||
}} | }} | ||
{{NPCTrainer|Class=Youngster|Name=Reggie|Lineup= | {{NPCTrainer|Class=Youngster|Name=Reggie|Lineup= | ||
{{NPCLineup|Pokemon=Raticate,Mankey|Levels= | {{NPCLineup|Pokemon=Raticate,Mankey|Levels=24,25}} | ||
}} | }} | ||
{{NPCTrainer|Class=Jackson|Notes=This encounter with [[Jackson_(rival)|Jackson]] is not required for the quest, nor is it of any quest antecedence; rather, it is an optional standalone battle. It is also notable that it rewards no experience payout|Lineup= | {{NPCTrainer|Class=Jackson|Notes=This encounter with [[Jackson_(rival)|Jackson]] is not required for the quest, nor is it of any quest antecedence; rather, it is an optional standalone battle. It is also notable that it rewards no experience payout|Lineup= | ||
Latest revision as of 04:01, 5 February 2023
| S.S. Anne - Kanto | ||||||||||||||||||||||||||||
|
||||||||||||||||||||||||||||
Location  A positional vantage point of S.S. Anne in Kanto. | ||||||||||||||||||||||||||||
|
||||||||||||||||||||||||||||
|
||||||||||||||||||||||||||||
S.S. Anne is an upscale excursionistic ship that docks into Vermilion Harbor.
It can be embarked on from Vermilion Harbor as soon as the player obtains the S.S. Anne ticket bequeathed by Bill upon completing his mini-task on Route 25, as well as the Cascade Badge from Cerulean Gym to access Vermilion City.
This is the domain of the eponymous quest that is required to obtain HM01 (Cut), as the quest's control flow is mostly confined within this ship. Once the rewarded Cut HM is procured, Vermilion Gym will become immediately accessible by virtue of the fact that this HM is needed to deobstruct the otherwise roadblocking tree nearby the Gym.
Once the quest is complete and the ship has been vacated, this area will no longer be accessible; as such, it is considered prudent to maximize all the obtainable resources on this ship, such as experience and monetary payouts from battle NPCs, lootable items, seen-data entries for the Pokédex, and so forth.
Notable miscellanies
Beverage-vendor
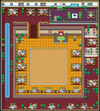
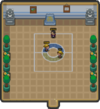
In the ballroom, Drink Waiter Dan will offer the following beverages.
Beverages | ||
| Item | Price | |
|---|---|---|
| Fresh Water | ||
| Soda Pop | ||
| Super Potion | ||
| MooMoo Milk | ||
| Berry Juice | ||
Player's bedroom
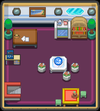
In the bedroom, you can heal your Pokémon by using the bed therein; this denecessitates Pokémon Center trips, thereby sparing you travels outside of this ship despite depletion from the glut of NPCs aboard.
Items
| Item | Quantity | Cooldown | Location | |
|---|---|---|---|---|
| Fresh Water | 1 | 7 days | Given by Matt nearby the trash-can bin in Room 7 on the first floor | |
| Chesto Berry | 1 | 5 days | Hidden Item. On the table in Room 6 on the first floor | |
| Great Ball | 1 | 7 days | Hidden Item. Topmost trash-can bin in the kitchen | |
| Pecha Berry | 1 | Instant | Hidden Item. Middle trash-can bin in the kitchen. Can only be looted if there is none in the inventory, and can be looted multiple times | |
| Hyper Potion | 1 | 7 days | Hidden Item. Bottommost trash-can bin in the kitchen | |
| Leftovers | 1 | 3 days | Hidden Item. It is lootable from the trash-can bin on the second-floor hallway | |
| Chesto Berry | 1 | Indefinite | Hidden Item. Trash-can bin on the south-west of the lower floor of the Ballroom | |
| Leppa Berry | 1 | Indefinite | Hidden Item. 3rd Trash-can bin from the west in the south of the lower floor of the Ballroom | |
| Oran Berry | 1 | Indefinite | Hidden Item. Trash-can bin at the very south of the Ballroom | |
| HM1 - Cut | 1 | Indefinite | Rewarded by the captain in his office upon completion of the area's questwork | |
NPC Trainers
B1F
S.S. Anne B1F Trainers | ||||||||||||||||||||||||||||||||||||
|
||||||||||||||||||||||||||||||||||||
|
||||||||||||||||||||||||||||||||||||
|
||||||||||||||||||||||||||||||||||||
|
||||||||||||||||||||||||||||||||||||
|
||||||||||||||||||||||||||||||||||||
|
||||||||||||||||||||||||||||||||||||
All NPCs cool down after 7 days unless noted contrariwise. | ||||||||||||||||||||||||||||||||||||
1F
S.S. Anne 1F Trainers | ||||||||||||||||||||||||||||||||||||
|
||||||||||||||||||||||||||||||||||||
|
||||||||||||||||||||||||||||||||||||
|
||||||||||||||||||||||||||||||||||||
|
||||||||||||||||||||||||||||||||||||
|
||||||||||||||||||||||||||||||||||||
|
||||||||||||||||||||||||||||||||||||
|
||||||||||||||||||||||||||||||||||||
|
||||||||||||||||||||||||||||||||||||
|
||||||||||||||||||||||||||||||||||||
|
||||||||||||||||||||||||||||||||||||
|
||||||||||||||||||||||||||||||||||||
|
||||||||||||||||||||||||||||||||||||
|
||||||||||||||||||||||||||||||||||||
|
||||||||||||||||||||||||||||||||||||
All NPCs cool down after 7 days unless noted contrariwise. | ||||||||||||||||||||||||||||||||||||
2F
S.S. Anne 2F Trainers | ||||||||||||||||||||||||||||||||||||||||||
|
||||||||||||||||||||||||||||||||||||||||||
|
||||||||||||||||||||||||||||||||||||||||||
|
||||||||||||||||||||||||||||||||||||||||||
|
||||||||||||||||||||||||||||||||||||||||||
|
||||||||||||||||||||||||||||||||||||||||||
|
||||||||||||||||||||||||||||||||||||||||||
|
||||||||||||||||||||||||||||||||||||||||||
All NPCs cool down after 7 days unless noted contrariwise. | ||||||||||||||||||||||||||||||||||||||||||
3F
S.S. Anne 3F Battleroom Trainers | ||||||||||||||||||||||||||||||||||||||||||
|
||||||||||||||||||||||||||||||||||||||||||
|
||||||||||||||||||||||||||||||||||||||||||
|
||||||||||||||||||||||||||||||||||||||||||
All NPCs cool down after 7 days unless noted contrariwise. | ||||||||||||||||||||||||||||||||||||||||||

