Manectite (quest): Difference between revisions
Created page |
No edit summary |
||
| (One intermediate revision by the same user not shown) | |||
| Line 1: | Line 1: | ||
{{Quest|Theme= | {{Quest|Theme=Electric|Region=Hoenn|Start=[[Route 123]], [[Berry Garden]]|Difficulty=Easy|Requisites=[[Mega Bracelet]]\ [[Cut]], [[Surf]] and [[Rock Smash]] (Or the correspondending [[Navigational_devices#Environmental_tools|tools]])|Rewards=[[Manectite]]}} | ||
The '''Manectite''' quest is the questline done in order to acquire the Mega stone for [[Manectric]]―the [[Manectite]]. | The '''Manectite''' quest is the questline done in order to acquire the Mega stone for [[Manectric]]―the [[Manectite]]. | ||
Latest revision as of 08:44, 31 August 2022
| Manectite (quest) | ||||
 | ||||
| Region |
Difficulty Easy |
Compulsory? No |
||
|
||||
Requisites
|
||||
|
||||
The Manectite quest is the questline done in order to acquire the Mega stone for Manectric―the Manectite.
Instructional Walkthrough
Mega Manectric’s quest can be started at Route 123's Berry Garden.
Needed is Cut, Surf and Rock Smash (Or the correspondending tools).
It is suggested to use a light weight Pokémon, but it is also possible with a bit heavier Pokémon.
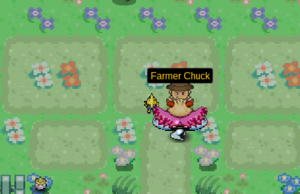
Interacting with Farmer Chuck will activate the quest. He will teleport the player to a starting point. Now the player must head to northwest, dodging, spinning and moving trainers, fighting two obligatory trainers and needing to interact with the Salamance Statue. Then, heading back in the same way in order to talk to interact with the Farmer again. This is needed to be done in under a certain time, which could be around 120 seconds.
Useful information and hints
- All the trainers have a randomised level 100 Pokémon with them. It's between a pool of Pokémon: Blissey, Shedinja, Ninjask, Steelix, Heracross, Shuckle and Alakazam.
The used Pokémon should be able to deal with all of them. Diggersby and Dragonite with following sets have been found out to be good.
Player's Lineup
| |||||||||||||||||||||||||||||||||||||||||||||||||||||||||||||||||||||||||||||
|---|---|---|---|---|---|---|---|---|---|---|---|---|---|---|---|---|---|---|---|---|---|---|---|---|---|---|---|---|---|---|---|---|---|---|---|---|---|---|---|---|---|---|---|---|---|---|---|---|---|---|---|---|---|---|---|---|---|---|---|---|---|---|---|---|---|---|---|---|---|---|---|---|---|---|---|---|---|
|
|
||||||||||||||||||||||||||||||||||||||||||||||||||||||||||||||||||||||||||||
| |||||||||||||||||||||||||||||||||||||||||||||||||||||||||||||||||||||||||||||
- Most trainers can and should be dodged. The only obligatory trainers are the Snorlax Cosplayer and the Monk next to the Rock Smash spot next to the Salamence statue. However, if the player interacts to them by accident, they will fight again.